Sunday, April 22, 2012

It's a Secret (6x6 layout using Prima Fairy Belle Collection)

I used a transfer technique on this tile using a picture of my daughter. I used molding paste, homemade spray ink, Tattered Angels Glimmer Screen Stencils (Garden),  Prima flowers, vintage trim, pearl trim, Rhinestones, and paint. You can view her Goth picture on my makeup blog http://www.makeupartsybynina.blogspot.com/2011/01/goth-lolita.html


Altered Shelf using Prima Fairy Belle Collection


 Altered wood shelf, and shot glasses using paint, flowers, trim, and the Fairy Belle Collection by, Prima
I will be placing this in my bathroom and will hold my makeup, perfume, and makeup brushes.


Faith (12x12 layout using Prima Fairy Belle Collection)

Sadness creeps up, and starts through a peep hole. Crawls its way down and makes you collapse. Then one day faith opens your eyes and you finally see a beautiful world above. Nina C.


I used Prima Fairy Belle Papers and flowers. I covered the vase with resin and sprinkled diamond dust and glitter. I love this layout and am totally in love with this collection. 


Wednesday, April 11, 2012

It felt like my arm had been torn off....12x12 Layout using The Prima Meadow Lark Collection

 I am a Mixed Media Artist and consider my style Avant-Garde, moving, expressive, and evocative. I always create based on how I felt at some point in my life.  I started crafting to find a way to express myself through my art.
It felt like; my arm had been torn off. It felt like; I suddenly had no legs to walk. I felt awkward. After 13 years of marriage fell apart, and my husband left me. I am not ashamed to admit how I felt. It was a hard thing to accept, and I still struggle, allowing that my family fell apart and that my kids don’t have both of us under the same roof. It took me a long time to accept things, but I never lost hope. I finally met unconditional love.  I realized life is not perfect, and it is never meant to be. I learned to love and appreciate the world around me. I felt a sense of relief and freedom.


This picture was one of my favorite images of my beautiful daughter when I did her makeup as the Black Swan. I love this picture because I wanted her to give me sadness, and she did a great job! This picture was taken last year in February and remained one of my favorites. It makes me feel darkness when I look at it. I used the beautiful papers from The Meadow Lark Collection by prima, which I love! I also added my homemade spray and Prima flowers. I used some prima stamps to add the journaling part. 

Her Angelic face expands the power of color!

I used the Martha Stewart circle cutter to add paint and make half circles as the beginning of this 12 x 12 layout. 
I created this layout from scratch. I started with a 12x12 white card stock and started painting half circles. I always try to expand the beauty in the simplest things. To me, black rings and half-circles are beautiful, so I went from there and used watercolor paints and some homemade spray inks, stamps, opaque gel pens, and some of my doodling. I used some handmade and store-bought flowers. I love the bright colors and happiness in the layout, which describes my niece Bianca. 

Martha Stewart simple circle cutter

I came up with a technique to paint circles using this cutter, and it worked!

Supplies needed:
Martha Stewart simple circle cutter, paint, foam dots, and a sponge.

1.     Remove blade and replace it with an adhesive foam square dot. 

       2.Cut out a piece of a sponge, and place on top of foam, since dots have adhesive already, no glue is required.

This is what you should end up with


3. Add paint
4.  Now use it as you normally would, only thing don't apply to much pressure. 
                         I love the way the paint glides and forms a perfect round circle. 
                              

 This is a start of a layout that I quickly came up the possibilities are endless!Hope this tip helps my fellow crafters. 


Sunday, April 1, 2012

More of my handmade Lollipop Mirrors :)


 I used images of Marilyn Monroe and Betty Page. I created frames and backgrounds on photoshop to make the picture unique and one of a kind. I printed copies on glossy photo paper and covered the image with clear vinyl to protect it. I took a plate and glued the image on one side and, on the opposite side, glued down a circle mirror. I then decorated with ribbon, lace, trims, flowers, bling, and fabric.
I made this one with a  Parisian style.


more shabby chic inspired


The alluring Betty Page


Wednesday, March 28, 2012

Hybrid Layout and Wearable Art


There is always a story behind my mixed media layouts; this is our story! I always tell my boyfriend, "he shot me with a bullet full of love," not sure what it feels to be shot… I assume someone feels it all over, and this is how he makes me feel. He has shot me with True love, Strength, Patience, Friendship, most importantly, to love myself. I love him to death! 

I entirely created this 12x12 page on Photoshop. I created a gun brush, and also used some flourish, grunge, and ink brushes. Then printed it on 140lb Canson watercolor paper. I have the Canon pro 9000, which allows me to print out sheets as big as 13x19.
I then added a picture of my boyfriend and I. I added ink, paint stickers, rub-ons, a bullet charm from a necklace I found at the dollar store, some wire material, distress ink, and some trim. 


                                                                     Wearable Art
I went further and made myself some wearable art with this layout. I used to pieces of  Inkssentials Memory Glass  1 ½ x 1 ½, copper foil tape, heart and bullet charm, alcohol ink, flux, soldering iron, lead free solder and a jump ring. I will wear it with pride!

Fairy Shadow Box


This shadow box was perfect to use for this project. The picture is of my eight-year-old daughter on the day of her Halloween birthday party.  I had fun making her costume, and fairy wings that year! The scrapbook paper used is the Prima Nature Garden Collection. PAint, trim, metal butterflies, and dyed flowers these items were incorporated to decorate the inside of the box. 


Monday, March 12, 2012

Design Team Projects using My Mind’s Eye Miss Caroline “Dolled Up” I want it all bundle!!!

This picture of my son and nephew was captured at the park by my daughter using her iPhone. I love this collection because of its bright neutral colors. It's always a challenge to find the right scrapbook papers and embellishments for boys, and when I saw these papers, I thought Playground, sun, kites. It goes to show when you hear "Dolled Up," it's not only for girls!!! Step by step instructions for this layout can be found here: http://blog.fotobella.com/ 

On a recent trip to Mexico, my mom found some old pictures. I had never seen this picture of my dad and me, it brought me to tears. He passed when I was 15, but there is not a day that goes by that I don’t think of him and miss him very much! I made a 12x12 layout using “Princess” Lace Paper, “Favorite” Decorate Paper, “Living” Blooms Paper, “Princess” Delicate Paper, and brads, stickers, buttons, and a tag.  I distressed the edges of all the papers and loved the way it turned out!

 A 12x12 layout using an image of my beautiful daughter Emily. I used “Day” Butterflies Paper, “Cute” Garden Paper, “Living” Everyday Paper, “Favorite” Decorate Paper, & “Living” Blooms Paper. Loving the papers I created flowers with the Tim Holtz tattered flowers die, used all the fun, and cute buttons, stickers, pearls, rub-on, & twine.


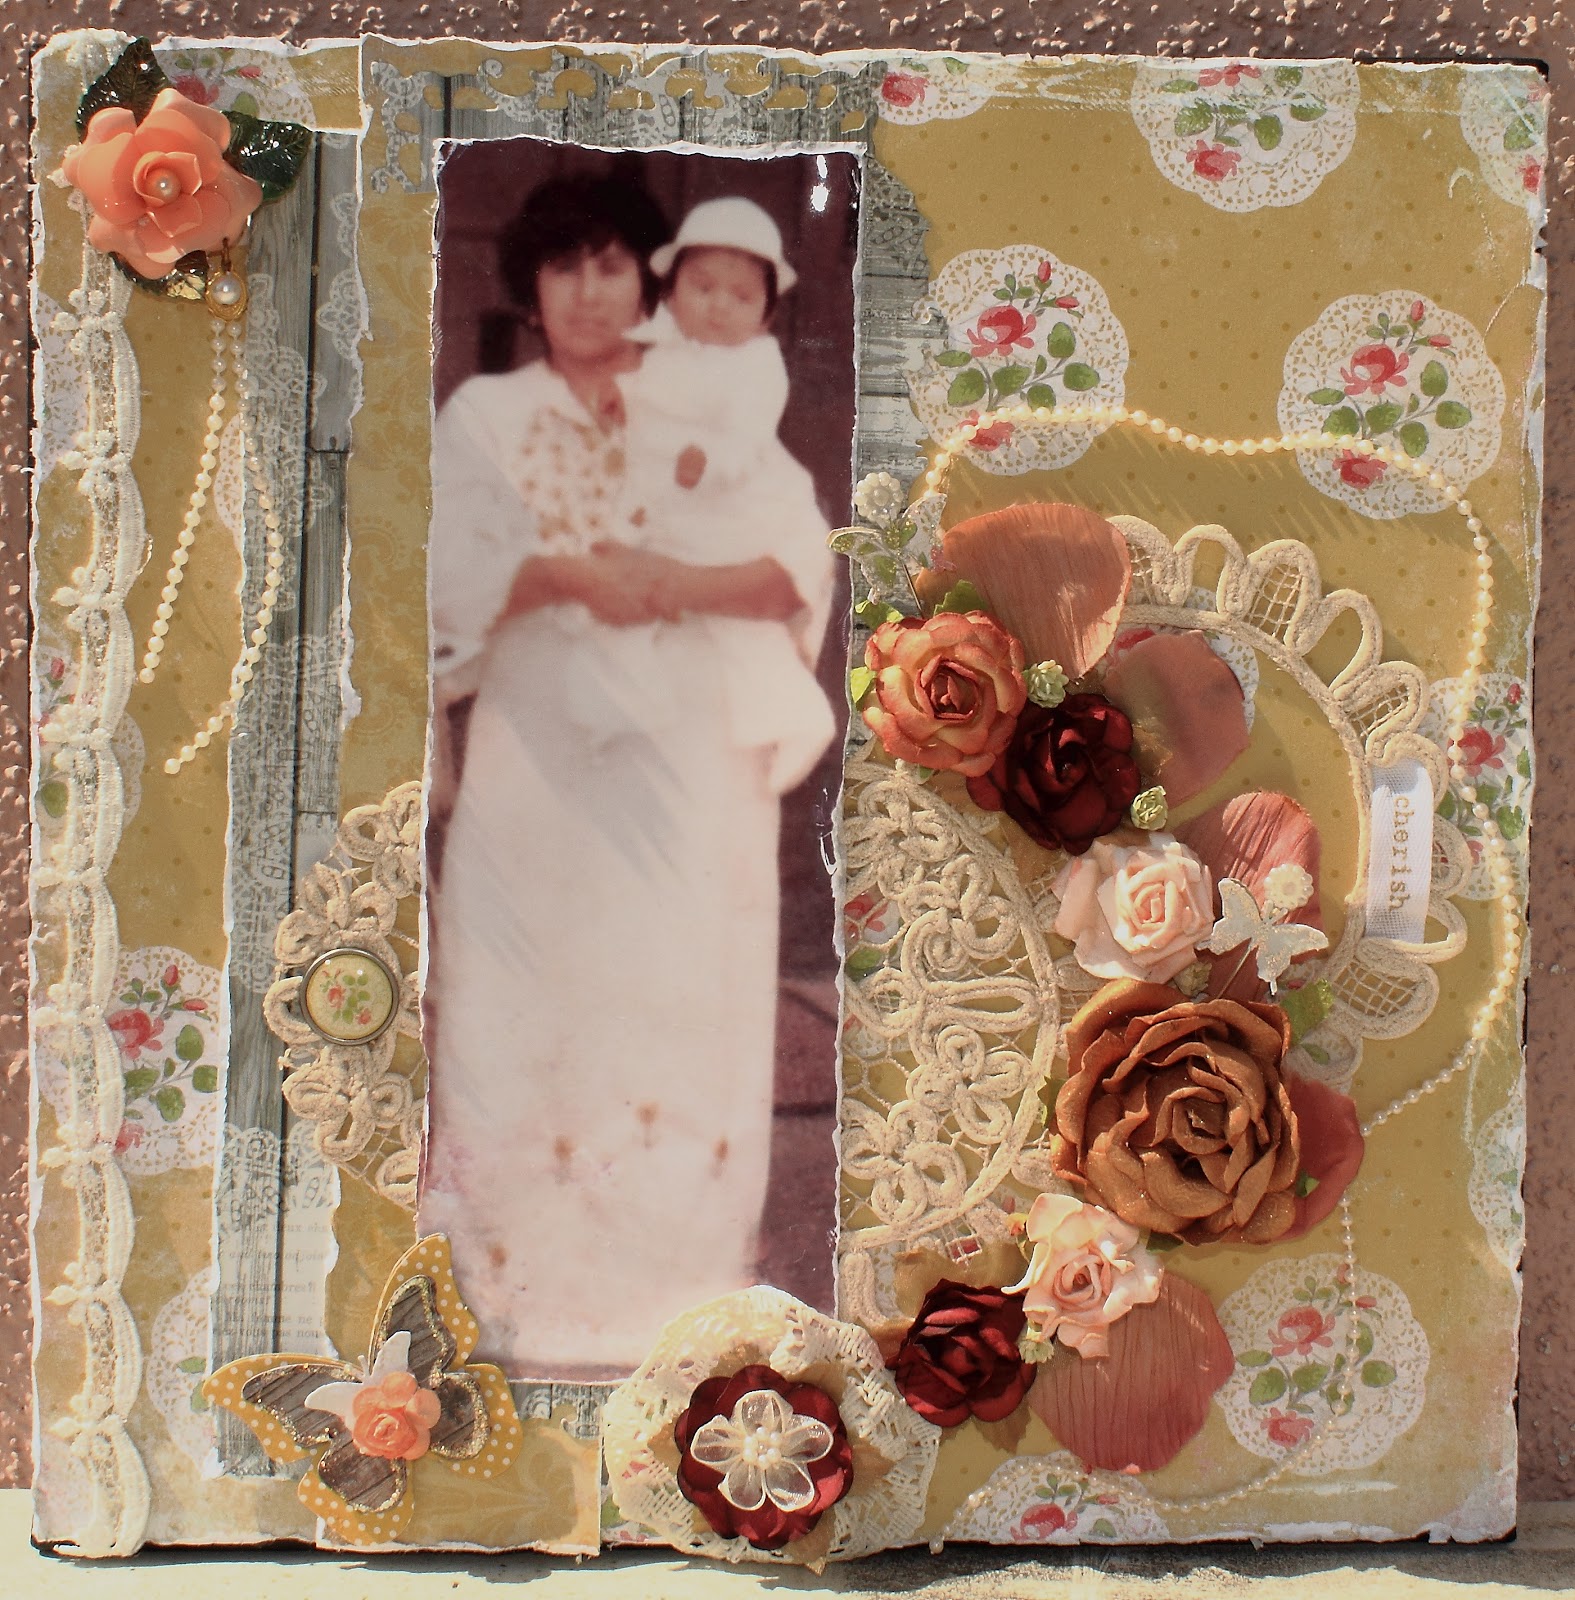
This picture is of my mom and my little brother. I used “Living” Blooms Paper, “Princess” Delicate Paper, “Day” Worn Paper, pins and buttons “Day,” layered butterfly stickers, and I decided to incorporate fabric doilies, paper flowers, lace trim, & pearl trim. Love the way it turned out hope my mom does too!!!

This is a card I made using my own drawing love it!!!


A  card I made using a  die cut wood butterfly piece as the focal point.  I stamped directly on the wood using the acrylic stamp in the collection.


 I made this tag using “Day” Butterflies Paper, “Princess” Delicate Paper, “Cute” Garden Paper, and ”Favorite” Decorated Paper. This tag is perfect for spring.